 Holixa T4R (Tools for Revit)
Holixa T4R (Tools for Revit, RvtTools) enhances the BIM application Autodesk Revit with a set of tools and automatic functions that will increase your productivity in Revit.

New ribbon:
The .Net application Holixa T4R is compatible with Autodesk Revit ("One-Box") 2024, 2023, 2022, 2021, 2020, 2019, 2018, 2017 and with Revit Architecture, MEP and Structure 2016, 2015, 2014 and 2013 (32-bit or 64-bit, any language version).
See also the Holixa T4R Help site.
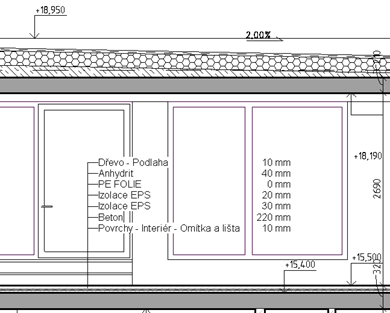
Structure Label creates automatic labels of the structure of compound walls, roofs or floors, including the material and thickness of each layer in the selected building element. On any change in the structure, the label will be automatically updated. Supports also combined/attached floors and walls. The labels can by customized by editing the family "CS_Arial_2mm". You can assign this command to a keyboard shortcut. In Settings you can specify the modifier for material names - using regular expressions you can remove any numerical thickness information (to avoid duplicate thickness values).
Sample video:
The application Job Time Tracker automatically tracks your true (net) time spent on editing a particular project (job). You can specify idle time delays (pauses between commands) which won't be calculated into the total project time. You can track individual sessions, total time and the number of executed commands. The resulting data can be exported to Excel.
The time-tracking information is automatically stored in a separate file in the same folder and with the same name as your project and with the extension .CSTIME. When you transfer your RVT file to another machine, make sure the .cstime file is copied along. JobTime tracks and displays these properties:
The tracking-reactor is ON by default. You don't need to run the JobTime command from the ribbon. You can run it to display your current time-tracking information, to set a new "Idle time" value (the setting is stored in the project file), to disable it temporarily, or to export the time-tracking statistics to Excel (or other spreadsheet application supporting CSV data files). There you can perform other advanced functions on the tracked data - like adding data from multiple RVT files, or multiple users, graph-presentations, adding price/billing data, etc.
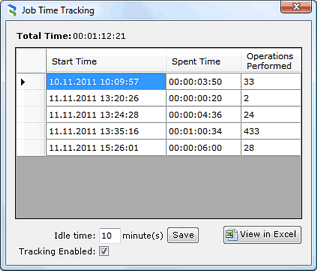

The file tracking is updated on document/project close (provided the project was saved at least once in this session). In Trial mode, the “Inactive time” and “View in Excel” options are disabled.
Sample video:
The function Reference List displays a list of all referenced files in the current project - e.g. linked DWG and RVT files, keynotes, shared parameters, decals (images).
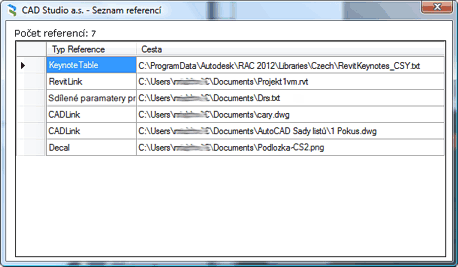
Sample video:
The function Link Checker is a tool that automatically checks for updates of external references in the project. Ths application will display a notification when an xref is changed.
Sample video:
The function Delete Imported Lines performs batch purging of selected linetypes imported from external formats. You can select the linetypes to delete from a dialog. See the extended version Clear Project.
Sample video:
The function Clear Project (Project Cleaner) can batch-clear unwanted selected types of elements from your projects. In the command dialog, you can select the individual element types. Thi function extends the original function Delete Imported Lines.
Sample video:
 Bulk family upgrade (V2019+)
The function Bulk upgrade allows to batch upgrade Revit projects, families and templates to the current Revit version.
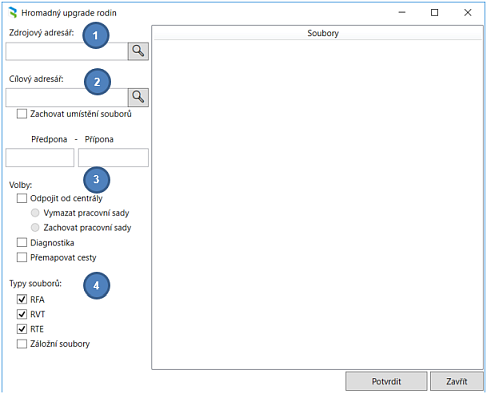
Sample video:
The function BIM Sign (formerly a standalone utility) watermarks your BIM document (a RVT project, RFA family or template .RTE/.RFT) with a permanent invisible signature. At any moment, you can then read this signature from the document and prove ownership (intellectual property, IP) of the given document. The signature reading functionality is active even without the Revit Tools license, e.g. after its Trial version expires.
More information - see BIM Sign
The function Who did it display the author(s) of the last editing operation performed on the selected element(s). You can check an individual element or a selection of elements. User names (IDs) are listed for the selected project elements.
Sample video:
The function Command Line displays a simple input window, where you can invoke Revit commands by typing their name, resp. a part of their name. The autocomplete box lists all commands matching the typed substring, including any keyboard shortcut and the ribbon path. Try to enter e.g. 'wall'.
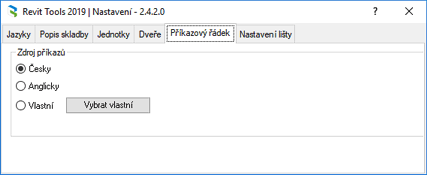
The selected command can be started by clicking on it in the list. If the command is unavailable in the current context, the command line turns red temporarily. You can choose the command name language in the Settings. By loading a currently exported keyboard shortcuts file (XML) you can add also commands from your add-on apps to the accepted commands list.
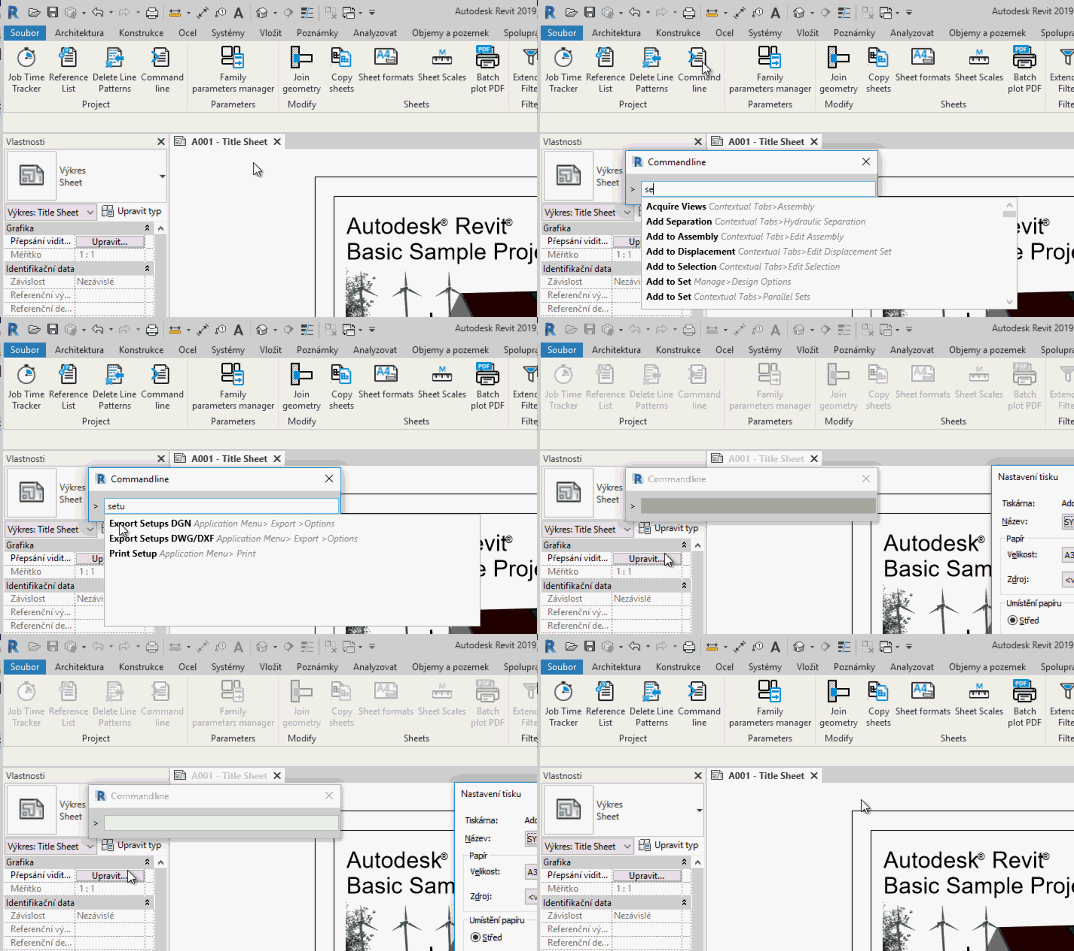
Sample video:
This function remains active even after your Revit Tools license should expire.
The function Import DTM simplifies cooperation when designing buildings and civil infrastructure projects. Loads terrain surface from Civil 3D including flowlines with all edges in shared coordinates. Imports terrain models by loading XML files created by the function Export surface from Autodesk Civil 3D using the add-on tool Civil Tools. You can also use the LandXML format. If both applications are installed on the same machine, you don't need to select the file to import.
The function Export geometry exports selected categories of elements from Revit to Civil 3D - e.g. foundations, retaining walls, volumes, etc. - for further landscaping in Civil 3D.
The function Parameter Manager manages parameters in the currently opened project - allows you to add more parameters from the shared parameters file in one go, or to clear existing parameters from the project in bulk. The tool can also easily filter in the list of parameters for better overview and control.
The function Edit Family Parameters (Family parameters manager) is a tool for batch editing of parameters in Revit families - you can delete, replace and add new parameters in multiple families at once.
Sample video:
The function Copy Columns allows you to copy parameter values from one column to another in schedules. For example when you need to access values that are only in schedules (calculated values, merged parameters, counts, length totals, etc.) and use them e.g. for labels, filter conditions, etc.
Since version 3.1 you can transfer settings from one project to another (using XML), and allows you to set the tool to run automatically when you save the project.
Sample video:
The function Coordinates adds the values of global and local coordinates (X,Y,Z) of selected elements to the selected parameters.
Sample video:
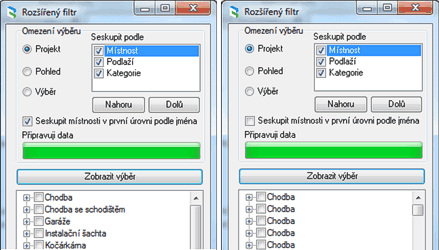
The function Extended filter offers - compared to the default Revit filtering - a more detailed selection of drawing elements. It allows to limit the selection to a project, to the current view or to a selection set. You can group selected components by level, room or category in any order. You can also filter by parameters contained in families.
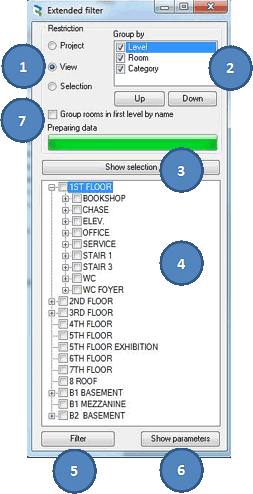
Grouped (left) and ungrouped (right) rooms:
Filter by parameters:
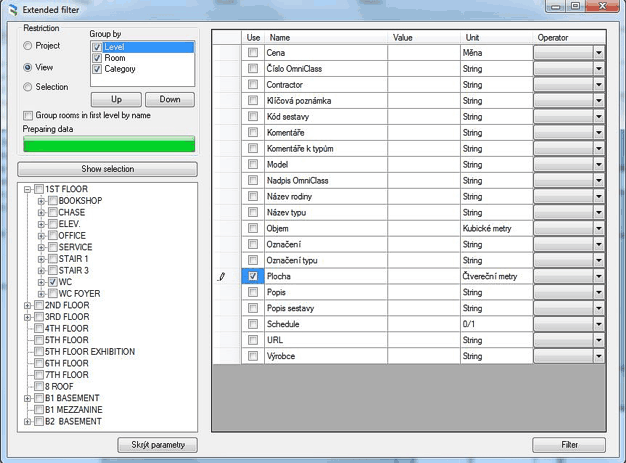
Usage:
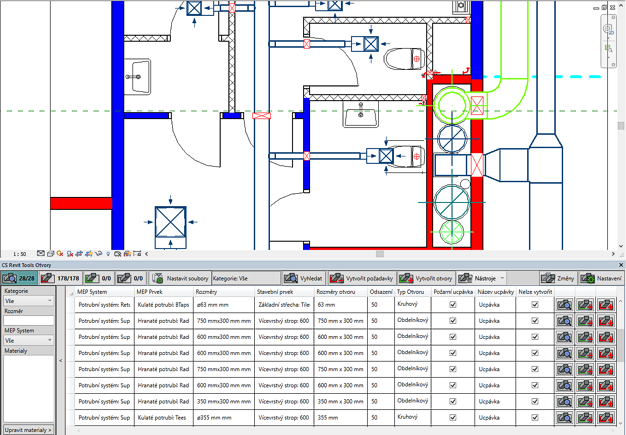
The function Opening simplifies the coordination process between the construction and MEP on projects and extends functionality of Revit standard tools for coordination checks. It can automatically create openings through building construction structures in places where they collide with piping and ducting. This application can be used by both architects and by MEP designers to attach opening requests, where they can manually set requested shape and dimensions. These requests are graphically noticeable proxy elements, displaying notifications to architects - when they attach a MEP model - so that they can create openings in the given position, with given dimensions defined by MEP designers. The architect gets a table report inside Revit, plus in the classic 2D and 3D Revit views. After they check the requests, all or some of the requests can be used to generate openings automatically. This tool offers wide customization options and allows o.a. filtering of colision elements by material, attaching information about fire inserts, or attaching comments displayable by other team members.
3D view with attached requests for openings
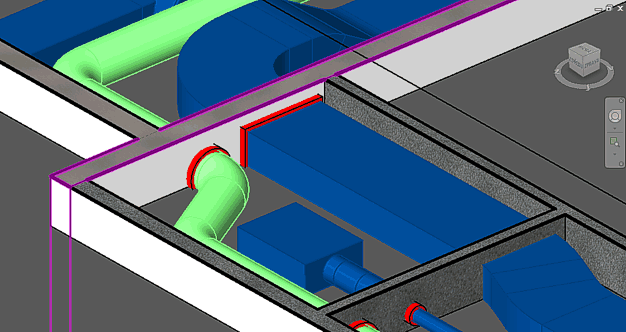
Dialog and plan view with requests (click for larger)
Videotutorial:
The function Floor Legend creates a visual legend (list) of selected floors, ceilings and roofs, incl. the labels for each layer (component). You can deploy this list to one or multiple views.
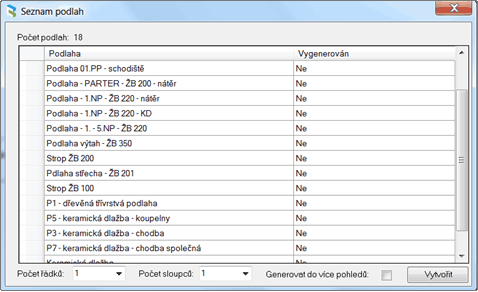
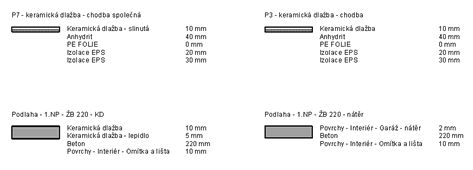
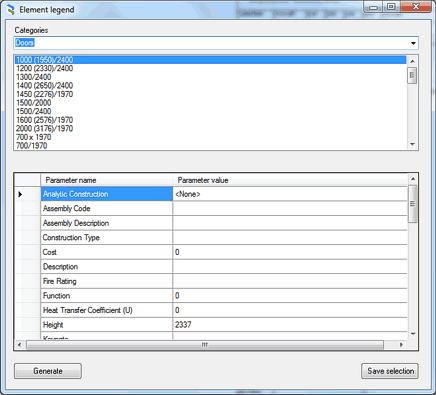
Generates a legend of windows and doors used in the project (not updated automatically). Choose a category, type and paramaters of the elements for the generated table.
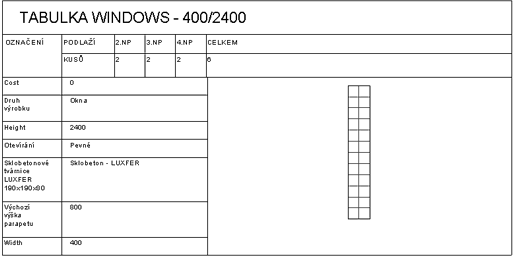
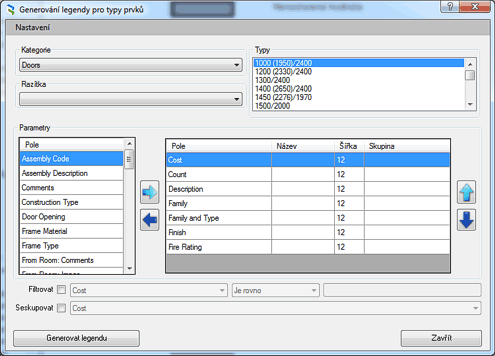
Generates a drawing with given drawing frame and inserts an element table with selected parameters and a legend of a selected element in a project (the table is automatically updated). Choose the category, type ane element parameters to generate the table.
Generates a legend of walls used in the project (not updated automatically). Choose the wall types for the generated table.
The window and door schedule feature is used to automatically generate legend components for items of a schedule. After selecting an existing schedule, it creates a set of sheets with the schedule itself and a legend for each of its items placed and organized on them. The legends contain legend components of selected type, their basic dimensions and a Type Mark or Mark tag as a reference to the schedule. The user can choose the types of generated legend components, their scale as well as the types of created dimensions and text annotations. It is a useful tool especially for fast creation graphical window and door schedules.
The function Floors in Room detects all floor types present in a specific room and inserts the "Floor type label" as a shared parameter to the room. So you can use it not only in schedules but also in room labels. In case of multiple floors stacked on each other, only the highest one is processed. Only straight (non-sloped) floors are supported.
Sample video (CZ):
The function RoomToFloor can generate floors in selected rooms. For each floor you can individually setup floor type, its vertical offset and you can also specify how the floor should handle windows and doors in the given room. Whether to take account of them and create floor area in the void. This function may be limited in terms of the precision of void detection in slanted reveals, and it cannot handle voids in arc walls.
Sample video (CZ):
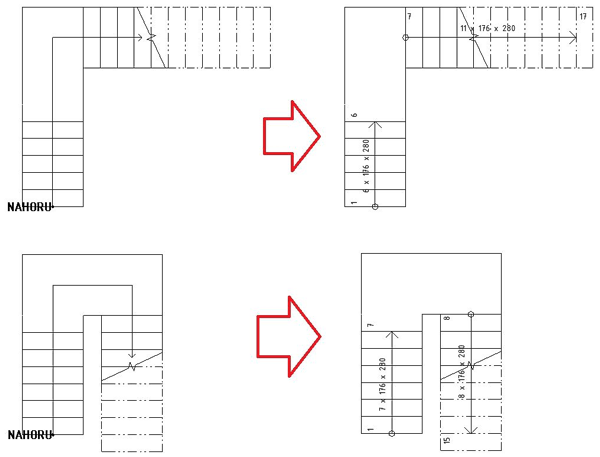
The function Arrow in Stairs allow to generate the stair arrow by national standards, including stair description and tread numbering - on a single mouse-click.
Sample video (CZ):
Continued dimension dimensions automatically all walls on a virtual ray. Just pick two points of the ray and all walls will be dimensioned.
The function Wall performs automatic dimensioning of the selected wall with multiple values. You can choose to dimension voids, openings, connected walls or only the overall dimensions. Specified dimension texts are automatically offset with predefined spacing. The "Opening" option dimension also the window height.
Sample video (CZ):
Dimension Text Mover will batch move dimension texts outside extension lines if they don't fit. You can preset different placement options for the dimension texts.
Sample video (CZ):
The function Text Alignment allows to align selected texts/tags to a selected text/tag, or you can align texts to an existing line. With texts, you can set the alignment method (left, center, right) and the line offset. For an existing line, you can choose to align text and its orientation to that line (perpendicular, along).
Sample video (CZ):
You can perform global search and replace of project texts - either for an automatic change of UPPER/lower/Title/Sentence case, or for advanced replacement options with regular expressions. This function extends the standard search/replace text functionality in Revit. With regular expressions you can delete parts of texts, add character groups, change order of text parts and perform other advanced text manipulations.
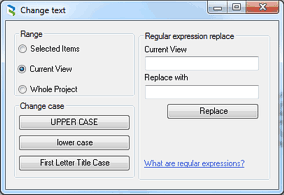
Example of a replacement:
(.+)-(.+) → $2:$1
converts texts of the type "A789-Var.B" to "Var.B:A789"
Sample video:
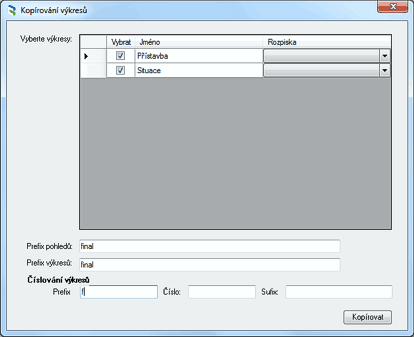
The function Copy sheets copies (duplicates) selected sheets and views with given prefixes and suffixes. You can separately rename sheet names, view names and sheet numbers.
Sample video:
The function Sheet Formats creates a parameter containg the number of formats (A/A4). Counts the number of A4/A formats in all drawing sheets in the project and writes the result to the specified parameter in the drawing. You can display the value in schedules and drawing legends to immediately check printing costs for the project.
Sample video:
The function Sheet Scales creates a parameter with a cummulative list of scales used in the drawing sheets (views).
Sample video:
The function Batch Plot PDF simplifies publishing of selected views and drawings to PDF files. It batch plots all checked views and drawings from your current project to separate PDF files, or to a single multi-page PDF file. Specify the name and output folder when printing to a single file. When printing to separate, individual PDF files, you can generate the file names parametrically - by combining a name and any number of parameters, project- or drawing-properties. You can select them from a list and add them (using the "+" button) to the PDF file name (parameters are enclosed in parentheses). When the PDF publishing files are created, these parameters are replaced by true values read from the published project. For the publishing, you can set the same plot parameters as in the standard Revit print dialog.
You can use this tool to create a set of PDF drawing sheets - even for multiple paper sizes - in a single step. The paper size is automatically set by the drawing sheet frame.
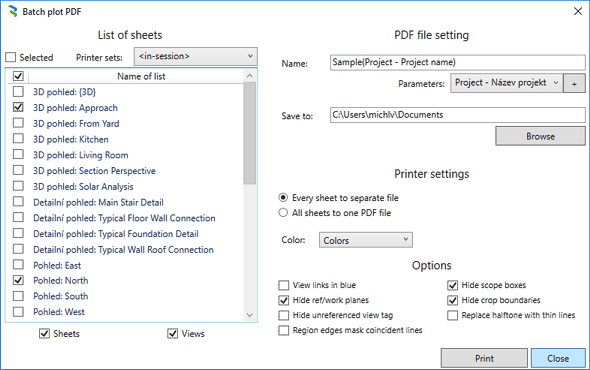
Batch publishing can make use of the PDF drivers "Microsoft Print to PDF" (included in Win10) or the free application CutePDF. NOTE: the publishing process has three steps - after you set the parameters in the above mentioned dialog, your print driver is invoked. It prompts you for a temporary PDF file and after its "printing" is finished, reselect this temporary file to complete the whole publishing process.
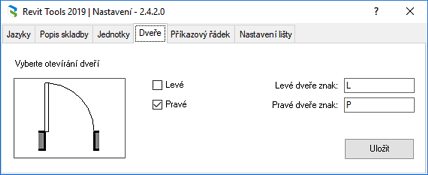
The function Door automatically recognizes the side of door swing direction (L/R) and writes it to the door properties. It also loads the door annotation which already contains this parameter. This all occurs automatically for new projects so you don't need to invoke any command. In existing projects you need to start the command Door - this adds the new parameter to all doors. L/R swing can be also used in schedules (see "Otevírání dveří"). You can find the L/R toggle in the application Setup
Varsion 1.9 (and 2.2) adds support for doors in curtain walls and fixes detection of swing changes in 3D views.
Sample video:
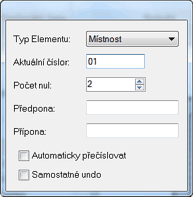
The Renumber function can renumber all rooms and spaces (MEP objects). You can specify prefix and suffix to the numbers, then select the individual rooms/spaces to renumber sequentially. In case the room contains a number already used in the project, you can swap the numbers of the two rooms or renumber all subsequent rooms with an incremented number.
Sample video:
The Room Area function calculates true area for selected room. It detects all voids and openings and offers to include or exclude them. The true area is stored to a parameter "Total area" (can be scheduled). The resulting room border is also created in an auxiliar plan view.
Sample video:
The function Room Finishes automatically detects room finishes and writes their values into the built-in parameters Wall finish, Floor finish and Ceiling finish.
The function Room height automatically detects and writes the clear height to the selected room parameter. If the room height is delimited by multiple elements with different heights, minimum and maximum height is written to the parameter.
Sample video:
The function Roof Area adds a label on the picked point with the area of the selected roof.
The function Rooms list shows the list of rooms in the current project and allows to calculate true area for selected rooms - it controls the function "Room Area".
The function Element ID writes the element ID to the selected parameter.
Sample video:
The function Item Placement writes the room or space name to a parameter of the project item. If you move that item (e.g. chair, computer, switchbox - any family) to a different room or space, that parameter will change automatically. For doors, the information about the room to which that door opens is being written. You can use this parameter in schedules.
Sample video:
The function Duplicate Views allows to bulk duplicate selected views from the current project. You can filter by view name, type, etc.
Sample video:
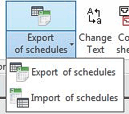 The function Export and Import of schedules allows to export selected tables to Excel a edit them in Excel - you can also read the edited tables back to Revit.
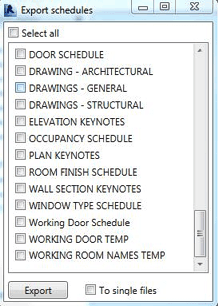
Use the option "Select all" to export all schedules in your project. The option "To single files" exports the individual schedules to separate files and names the files by their Revit schedule name.
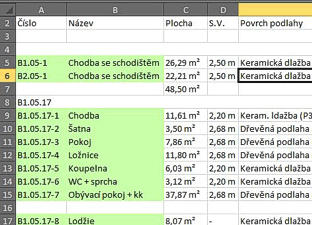
Green-colored parameters in the Excel sheet can be edited and then imported back to Revit using the function "Import schedules". In case the sheet contains multiple rows with the same type parameter, the import to Revit writes back the value from the last line.
Data in Excel:
Sample video:
Mass joining of elements by selected categories, including the option to set the first and second level priority.
Sample video:
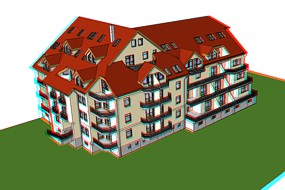
The Anaglyph function creates a 3D anaglyph or the current scene (3D view). You specify the eye distance, the output resolution and Anaglyph creates an anaglyph from your current 3D non-perspective view in the RVT project (it creates its own temporary perspective). The resulting PNG file is stored in the project's folder (watch for R/O folders). This function remains unlocked even after expiry of the Trial version.
See also the Anaglyph add-on tool for AutoCAD and Inventor.
Only in Revit MEP you can use the tools Duct Splitter, Element Renumber etc:
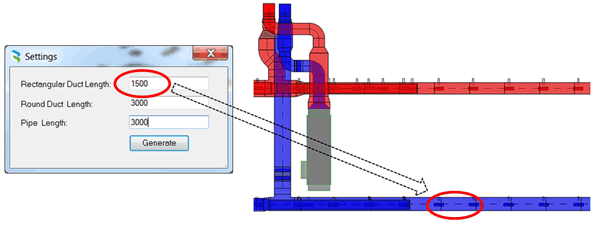
The function Duct Splitter splits the selected duct to segments of a specified length. Automatically inserts a connecting link in all split points. For globally selected ducts you can specify the segment length individually for rectangular and circular ducts or waste water pipes.
Sample video:
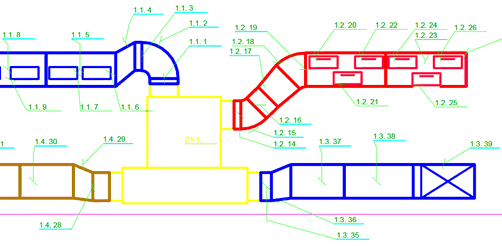
The function Renumber ducts renumbers all devices and ducts in the selected branch from a given number. Just select the first element of the duct branch. If you renumber only a part of the duct, select the start point and the direction of renumbering. In case the branch contains element of the same type and size, it will be assigned the same number.
Sample video:
The Duct insulation tool create multiple insulations on existing ducts and pipes (all pipes in a given system/diameter). The function is table-driven.
The Fitting Area tool calculates the estimated insulation surface area that is used on pipes and duct fittings.
Sample video:
The Describe duct function adds duct annotation labels at all connector points. In the settings you can select the requested annotation element from the list - for circular and rectangular ducts, or you can apply the labels to all elements in the view or just to the selected ones. You can also select the label insertion style - left, right, both ends, etc.
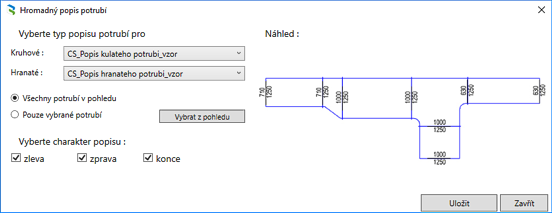
The function Duct symbols adds annotation symbols on ducts and pipes. In the dialog you can specify system, symbol, offset and diameter.
Adds flow direction of vertical pipes to the floor plan. You can specify the systems, views for placing arrows and arrow angle.
Deletes selected fitting, part of the pipes.
The function Thickness creates a shared parameter "Thickness" containing the pipe thickness (pipe wall). This parameter is important e.g. for automatic labels outer diameter x pipe wall thickness, used on plastic, inox steel, copper and multi-layer (metal-plastic) pipes.
Sample video:
The function Route Length displays the total sum of the lengths of selected elements in the route (support for pipes, tubes, cable trays, ...).
The function Units allows to assign used measurement units to selected parameters. You can then easily create multi-category schedules with proper units for listed values.
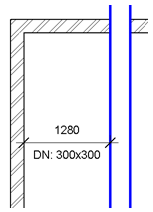
Creates a dimension between the selected wall and a duct/pipe and adds the DN parameter from the selected pipe to the dimension label. After you start the command, first select the wall and then the pipe/duct element.
Online tools simplify access to web resources for users of Revit and Revit Tools - to the application homepage and to the Revit RFA libary on CADforum.cz.
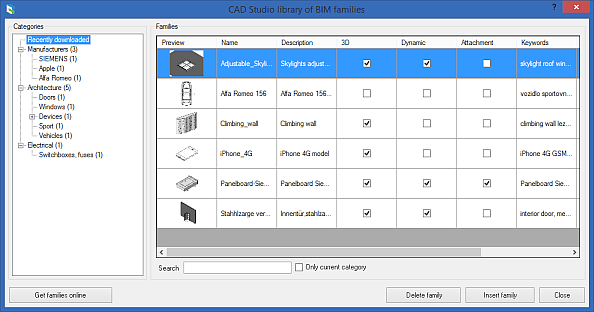
The online tool of family catalog allows an unlimited access to downloads of RFA families from the BIM library on CADforum.cz with inserting the families to the current RVT projectu. The downloaded families can be locally catalogized to categories and repeatedly inserted into your projects.
The Settings dialog allows to change the language of the application and set parameters for some functions (e.g. Structure Label), sets units (mm/feet/inch) and method of L/R doors detection (toggle) and labels. You can set the command language for the Command Line and reload its command list. You can also enable/disable individual Revit Tools icons in the ribbon.
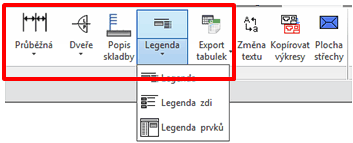 Since version 1.9 the application ribbon was simplified and common functions were grouped to flyouts. New flyouts are: Dimensions, Legend, Schedules, Door. Click the upper part of the icon to start the default command, click the lower part to display the fly-out menu.
The Revit Tools functionality is rapidly enhanced. You can send us proposals of other functions that will make your work in Revit more effective.
The Trial version is time-limited (15 days) and has limited functionality (some advanced functions missing).
If you are interested in the commercial version of Holixa Revit Tools, use the BUY icon below or contact CAD Studio/Arkance Systems.
Price of the commercial version of Revit Tools is 495,-EUR -
![]() (for Revit 2023/2022/2021/2020/2019, 2018/2017/2016, 2015/2014/2013)
(for Revit 2023/2022/2021/2020/2019, 2018/2017/2016, 2015/2014/2013)
Czech customers can order through this link - ![]() .
.
 Trial version of Holixa T4R (Revit Tools) can be downloaded from Download (for Revit 2024, 2023, 2022, 2021, 2020, 2019, 2018, 2017, 2016, 2015, 2014 and 2013) or from the Autodesk Revit Apps store

